 Masterclass
# 2
Masterclass
# 2
In this masterclass, you will learn how to make the P Sprite yellow work for you in retexturing objects to match your favourite sets. I am assuming that you have completed the tutorials & first masterclass, as I will be referring back to skills and using terminology learned at those times.
I said in my first masterclass that by now, as an experienced object maker, you should have a love / hate relationship with that yellow in your P sprite. Here is where we come to love the yellow. Oh yes. We're stuck with it, so let's make it work for us.
The tools we are going to use should look like this:
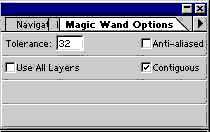
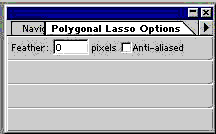
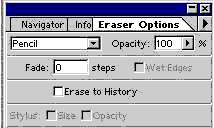
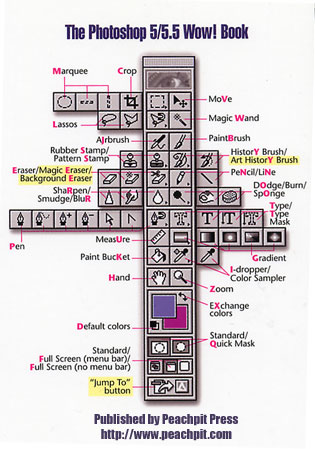
Can't remember which tool is which? Here's our reminder yet again. I am not being paid by them to say this, which is a great shame, but nevertheless I really can't recommend the Peachpit press WOW! books highly enough. They may be a little more pricey than most, but they take things step by step, are in full colour AND come with a tutorial disk. One day I will upgrade both Photoshop book and program to version 7, but as I have no real need to at the moment, I am sticking with 5.5.
Make sure that if you are going to distribute your work (and please do, bunny wuffles NEEDS new objects for her game) that you give the appropriate credits on your site and in your object descriptions as outlined in the Recolourers Resource.
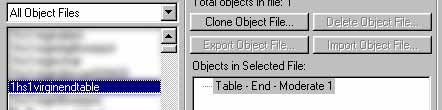
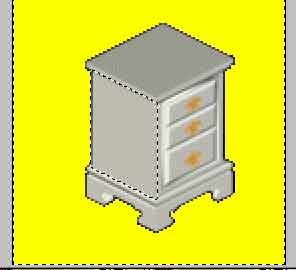
I am assuming you have unzipped and now installed the items called 1hs1virginendtable.iff and mifturkishladycounter.iff to your "ThingsICanClone" folder (or whatever you use for free to clone items), and if so, open up Photoshop, open up TMog and find the file called 1hs1virginendtable.
I am going to recolour this to fit in with my Turkish Baths theme. I have chosen this table because the original creator has used the same table leg shape as the mediæval counter which I also use in this theme. As this is going to be a simple recolour, clone the 1hs1virginendtable, giving it your new name, and when exporting it, leave the "Just Change Colors" box checked. Go to Photoshop and open up your two sprites. Change the colour modes to RGB so we can work in layers.
Next, you need to open up the sprite images of the counter to get the texture we are going to use. You can, of course, use any texture you like to do this, and I am only using my own as an example. Go back to TMog, find the file "mifturkishladycounter" and export the sprites to your usual folder.
Because I have changed all my files to Read-Only to make my game quicker to load, I have to clone the file because the Export Object File button is greyed out. This will mean I now have two counters in your game, which of course I don't want. What I do in these cases is give the clone a new name starting with the word Sprite - in this case, Spritescounter. If your files are read-only, I suggest you do this too. Once you have exported the sprites, use TMog to find the object file Spritescounter and use the Delete Object File button to get rid of it. I actually keep all sprites that I export in this way for future reference in a separate folder. Saves me having to go through all the rigmarole of cloning, exporting, deleting every time I want to use that texture / image. But that's my preference, you may have your own system of organising all the spare sprite maps & .xml files (the recycle bin.....)
![]()
OK, in Photoshop, open up these sprites as well. You only need the ones in the folder sprite0100 because the end table we are retexturing does not tile round corners like a counter does.
You should now have four tiled counter image and two white end table image sprites up in Photoshop. Let's work on the front view of the table first, so bring the Counter-Castle_large_ne_p.bmp and endtable-graphic_large_front_p.bmp images to the foreground, and minimise all the others for now.
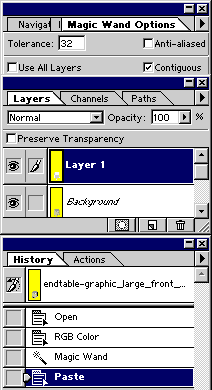
In your white table sprite, use your magic wand tool to select all the yellow background. Ctrl-c to copy and ctrl-p to paste into a new layer.
Can you see that our new layer has made the table image invisible? The grey and white grid shows that there is nothing in that portion of the image. This is our insurance policy against damaging the edges of the yellow in any way that would show up in the game, and makes using the polygonal lasso tool much easier when working in the background layer.
 OK,
we are now going to work exclusively on the background layer, so highlight
that in your layers pallette. Use the zoom tool to get a little closer to
the action. The first thing I am going to change is the side of the table,
so, using the Polygonal Lasso tool, select the side of the table as the
image on the right; right click and select inverse, then ctrl-c to copy
and ctrl-p to paste into another new layer. This is a layer of the entire
sprite WITHOUT the piece we are going to be working on.
OK,
we are now going to work exclusively on the background layer, so highlight
that in your layers pallette. Use the zoom tool to get a little closer to
the action. The first thing I am going to change is the side of the table,
so, using the Polygonal Lasso tool, select the side of the table as the
image on the right; right click and select inverse, then ctrl-c to copy
and ctrl-p to paste into another new layer. This is a layer of the entire
sprite WITHOUT the piece we are going to be working on.Once again, highlight the background image in your layers pallette.
 Go
to your counter image, use the magic wand tool on the yellow, then right
click and select inverse & ctrl-c to copy. Go back to your table image,
and with the background image still highlighted in your layers pallette,
ctrl-v to paste the counter image into here. We now have a new layer -
Layer 3. Can't see it on the sprite? It's there, believe me - it is now
sandwiched underneath the sprite we last made - and the proof is in the
Layers Palette.
Go
to your counter image, use the magic wand tool on the yellow, then right
click and select inverse & ctrl-c to copy. Go back to your table image,
and with the background image still highlighted in your layers pallette,
ctrl-v to paste the counter image into here. We now have a new layer -
Layer 3. Can't see it on the sprite? It's there, believe me - it is now
sandwiched underneath the sprite we last made - and the proof is in the
Layers Palette.
Use your move tool to position the tiled counter into place. Can you see that because this new layer is sandwiched, only the bit we want to transform shows the new texture! You may want to scale it down a little - you can still do this successfully by using Edit/Transform/Scale as normal; you will only be scaling in layer 3. OK, my table now looks like this, and if yours doesn't, one of us has missed something out in the tutorial so far......
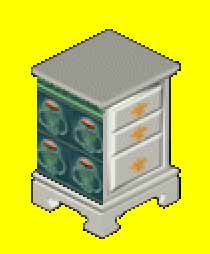
OOOOO! Lookit that! Nice clean edges, no erasing, no smudging, no pencilling! Now might be a good time to save your work. Flatten the image and save as the usual .bmp file.
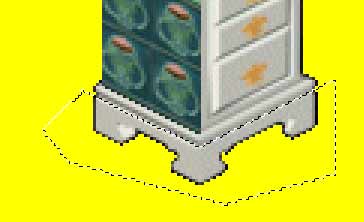
Now we have done this part together, I am going to rely on you and your skills to do the same with the rest of the cabinet - the top, the front, the legs and the beading between the legs & cabinet. Take each portion at a time from where I say "Here we go - ready to start editing our image". And here's a handy tip - because we are working underneath the yellow background layer, selecting the legs is as easy as this:
You may find you have to erase part of the image at times, especially when doing the legs, but because you are working in layers, you will only be erasing from the layer you are working in - your hard work elsewhere will be intact. In fact, while you are working on the underneath of the first layer - the all-yellow layer - you can erase, paste, flip, smudge, pencil to your hearts content without affecting the shape of the object. OK, we can't do much to the general shape during a straight recolour like this except accidentally smudge some of that yellow into our object, but I am sure you see the implications for working like this when you are actually reshaping or creating a totally new object.
If it really bugs you working underneath a layer, you can always make that layer temporarily invisible by using the Layers Visibility function. Let me recap from the Z buffer tutorial a moment as to what that is and does:
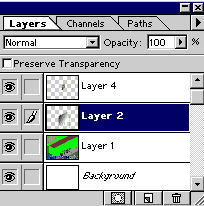
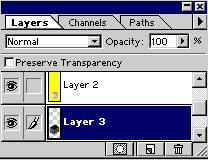
 On
the left hand view of our Layers palette, we can see that my Layer 2 is
highlighted and the paintbrush shows it is the layer we are currently
editing. Next to the paintbrush is a little eye icon. This is the "Layers
Visibility" function, and if you click on the little eye icon now,
the layer will become invisible on the Screenshot layered image.
On
the left hand view of our Layers palette, we can see that my Layer 2 is
highlighted and the paintbrush shows it is the layer we are currently
editing. Next to the paintbrush is a little eye icon. This is the "Layers
Visibility" function, and if you click on the little eye icon now,
the layer will become invisible on the Screenshot layered image.
The layer is still there, but we have just made it invisible for the moment, and we can work on all the layers as normal (except that one) by highlighting them as usual. To make it visible again, click the box to restore the eye.
I have to say on my part, when retexturing an object using this method, I prefer to work underneath the layer so I can see what the finished article will look like - but it is your personal preference how to work; I am just giving you as many options as I know how.
![]()
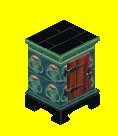
OK, your finished image should now look something like this: