
 Masterclass
# 3
Masterclass
# 3
In this masterclass, you will begin to learn how to make layers work for you in getting a patterned image to line up correctly on a two-tiled object. I am assuming that you have completed the first tutorials & the first two masterclasses, as I will be referring back to skills and using terminology learned at those times.
This technique can be used to successfully line up an image on any multi-tiled object, but for ease of working on this for the first time, we are going to attack one of my Palm House paintings. I enclose it in the BunnyWufflesTutorial Kit and you should install this in your "Free to clone" or "Transmogrified" folders before starting this tutorial.
Do remember, when cloning someone else's work, please make sure that you give the appropriate credits on your site and in your object descriptions as outlined in the Recolourers Resource. It's a good habit to get into even if you don't think that you are going to distribute your work (but please do, bunny wuffles NEEDS new objects for her game) as you won't have to edit it again if you change your mind in the future, and it is also handy to have as a reference to where the original object came from.
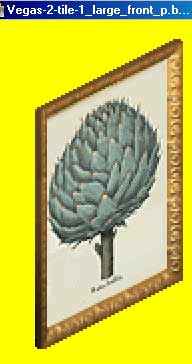
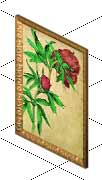
We are
going to replace this image....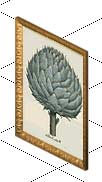 ....with
this one.
....with
this one. 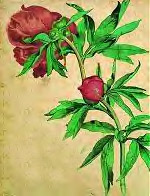
Right click and save this new Peony image as a .bmp to your appropriate folder. I generally use my "spare sprites" folder for images like this, in case I want to make things to match it in the future. Saves me having to search all through my compy for it at a later date.
The options palettes on the Photoshop tools we are going to use should look like this:
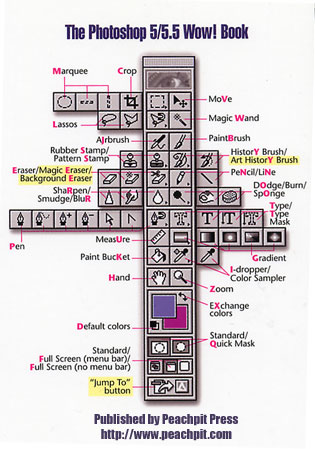 Can't
remember which tool is which? Here's our reminder yet again. I am not
being paid by them to say this, which is a great shame, but nevertheless
I really can't recommend the Peachpit press WOW! books highly enough.
They may be a little more pricey than most, but they take things step
by step, are in full colour AND come with a tutorial disk. One day I will
upgrade both Photoshop book and program to version 7, but as I have no
real need to at the moment, I am sticking with 5.5.
Can't
remember which tool is which? Here's our reminder yet again. I am not
being paid by them to say this, which is a great shame, but nevertheless
I really can't recommend the Peachpit press WOW! books highly enough.
They may be a little more pricey than most, but they take things step
by step, are in full colour AND come with a tutorial disk. One day I will
upgrade both Photoshop book and program to version 7, but as I have no
real need to at the moment, I am sticking with 5.5.
Unzip the painting to your "ThingsICanClone" folder (or whatever you use for free to clone items); open up Photoshop, open up TMog and find the file called mifpalmhouselargepainting1. Clone this painting, give it an appropriate name (mine is called, imaginatively, mifpalmhouselargepainting6) and when you click the export button, check the "Just Change Colors" box as we are going to keep the shape just as it is. PLEASE NOTE HOWEVER: if you want your painting to be "backless" - ie. so it can only be seen on a front view, you will have to follow the steps outlined in my "backless objects" TMog masterclass.
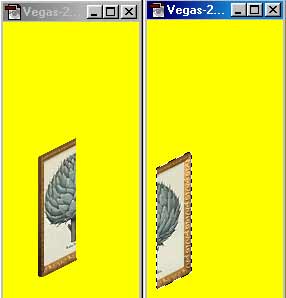
In Photoshop, open up the two front views of your sprites: Vegas-2-tile-1_large_front_p.bmp & Vegas-2-tile-2_large_front_p.bmp, and convert both into RGB images so that we can work in layers. On your Vegas-2-tile-2 image, click the magic wand in the yellow, and right click & select inverse so that the lil ants run around your half-a-painting.
Crtl-c copy and ctrl-v paste this into your Vegas-2-tile-1image. You may want to get up closer to this image now, to save your eyesight in later life, as you are going to line up the two halves of the painting to make an exact whole one. Like so:
Don't forget,
this may look like one painting, but is still two layers. And even if
it wasn't, it would not matter too much because we are not altering the
sprite shape as we checked the "Just Change Colors" box. Now
you need to copy your new Peony image and paste it on top of these two
layers, creating a third layer.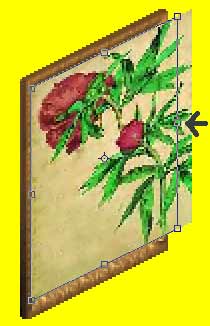 You may find you have to Edit/Transform/Scale to get
it the right size. Next, Edit/Transform/Skew the painting
to fit the frame. You will recall from the Easel tutorial that the best
way is to select the box I have marked with an arrow to skew the image
with, so that
you don't skew the picture out of proportion.
You may find you have to Edit/Transform/Scale to get
it the right size. Next, Edit/Transform/Skew the painting
to fit the frame. You will recall from the Easel tutorial that the best
way is to select the box I have marked with an arrow to skew the image
with, so that
you don't skew the picture out of proportion.
Edit/Transform/Scale it again until it fits the frame.
Because we checked the "Just Change Colors" box, we can just go ahead and flatten, convert (Image/Mode/Indexed/Selective) & save as this new shape won't alter the sprite shape of the object when importing it.
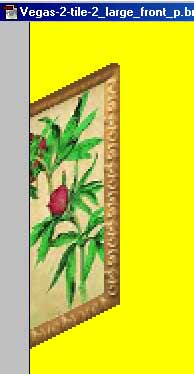
For the second half of the painting, we are going to repeat most of the steps above. On your new Peony painting sprite, click the magic wand in the yellow, and right click & select inverse so that the lil ants run around your painting. Crtl-c copy and ctrl-v paste this into your Vegas-2-tile-2image. You may want to get up closer to this image now, to save your eyesight in later life, as you are going to line up the painting to make an exact whole one. Like so:
Again, because we checked the "Just Change Colors" box, we can just go ahead and flatten, convert (Image/Mode/Indexed/Selective) & save as this new shape won't alter the sprite shape of the object when importing it. OK, back to TMog and import your new painting.
And there we are! A perfect, seamless match!