
 Rug
Making Tutorial
Rug
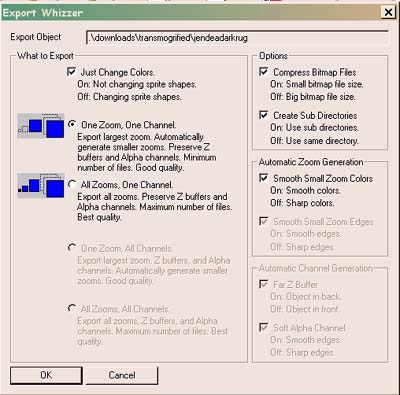
Making TutorialThis tutorial assumes that you are familiar with TMOG and also have a working knowledge of Photoshop. If you have not completed a simple color change operation before, I would recommend completing the tutorials on this site, and/or the flamingo color change tutorial available at the Lush Creations website before tackling a rug. I also did quite a few single tiled objects before trying the multi-tiled ones myself.
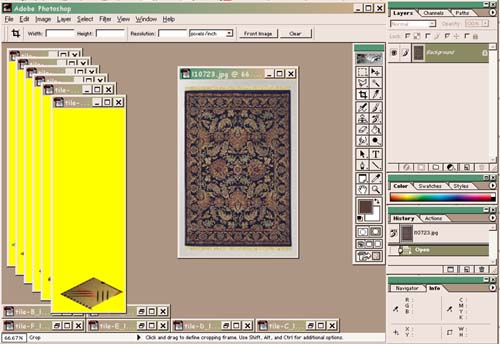
Ready to get started?
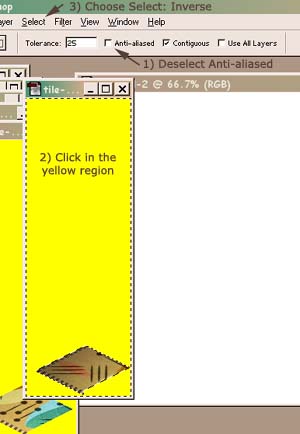

Satisifed with your alignment? Continue to
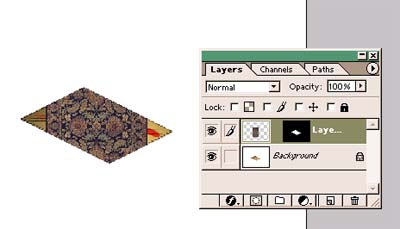
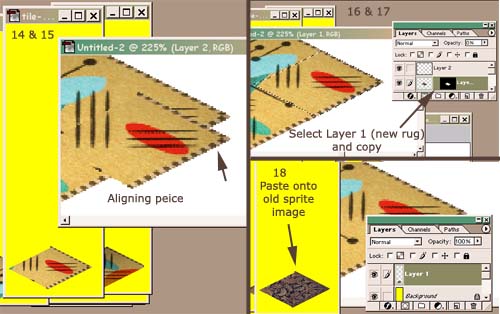
Next comes the slightly tricky part. We have to transform the new rug to fit right over the old one exactly. Make sure Layer 1 is selected as in the example above, then choose Edit: Free Transform to rotate the rug and move it over on top of the old one. Once you are in Transform Mode, set the angle to -26.8, the Height Skew to 36.9 and then push in the sides to match the edges of the rug. Note: these numbers are for the Back View. The front view will be different.
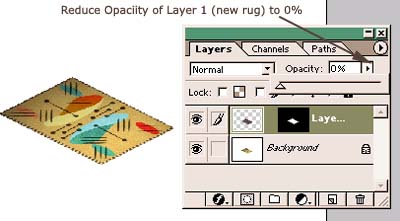
OK, so now we have to break up the rug into the six pieces again and copy them back over the sprites. First go to the layer options for the new rug in the Big Window and reduce the opacity to 0% so that the new rug becomes invisible.
Great!
You get the idea - Now finish the job:
OK, I don't want to tell you this now, but that was only one view. The whole process has to be repeated for the front view. I about had a heart attack the first time I did one of these, and realized I was only half way through, but in time, you get really fast and you can knock these out in an hour or so.
|