First Steps in Animations
By Bunny Wuffles
|
I am therefore assuming you followed all the previous tutorials; if you didn't, you really should go back and take a look because I will be referring to terminology, steps and processes learned earlier. As you know by now, I use Photoshop 5.5, but I think the principles of what we do here can translate pretty much into PSP-ese, or that of any other paint program. However, as always, forgive me in advance if I sometimes sound a little too basic, especially as you are now an advanced Photoshop user! ;o) I have said this before and I WILL say it again. There are probably as many ways of making a new object as there are object makers. Some use different methods to achieve the same effect, some know short cuts that others don't; and some utilise any combination of those and more. This tutorial shows the way I make my new stuff, and by no means am I trying to imply that these are the definitive and only ways of doing this - rather, just an easy way to start you off on your own mogging adventure. During the course of all this, you will learn how to make an animated picture from scratch. We are also going to take our first look at the XML.file and as always, we will also be learning some new Photoshop techniques including using the Actions palette and Batch Automation. |
|
Introduction |
|
There are a few animated objects in the game such as fireplaces, some sculptures, floor candleabra and flickering wall lamps. These are just as easy to clone and manipulate as static objects - except there are more sprites to play with. Until now, the single tile objects we have looked at have only had one sprite per rotation. With an animated object, we have one sprite per rotation per animated state. So if an object has a simple movement like the burglar alarm which just flickers on and off, that would be two sprites per rotation - one for on, and one for off. For a fireplace which has a changing flicker on the fire, there would be four or five sprites per rotation - and remembering that a fireplace is a two-tiled object, that is for each tile. As if TMoggery wasn't time consuming enough!
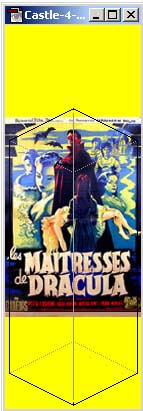
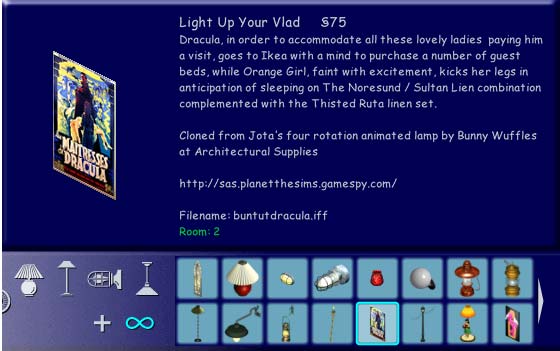
This film poster is a high quality .jpeg file which you will need for this tutorial, so right-click on it and Save Picture As in your normal images folder.
|
|
|
|
Now,
when I first found this picture I was a little bit confused. Seeing
that blue & yellow combination, I naturally thought that Dracula,
in order to accommodate all those lovely ladies who appear to be paying
him a visit, had gone to Ikea with a mind to purchase a number of guest
beds. The Noresund / Sultan Lien combination complemented with Thisted
Ruta linen perhaps. Then I realised it didn't say "mattresses" but "MAITresses" and suddenly the film premise changed. For the worse I might add. I would have quite liked to have seen how the Master Of The Undead managed to deal with what must be considerable furniture needs (such a huge castle to furnish) on a limited budget (I'm guessing that Vampire as a job description doesn't come with a huge salary). Instead, it would appear that despite being called "The Brides Of Dracula", this classic English gothic horror film actually doesn't feature all those Swedish-flag-hued lovelies queuing to pledge their troth in the Holy State Of Matrimony with the fanged one; more that he is after raising the village girls from their graves to raise havoc / make mayhem / found some kind of Transylvanian finishing school. Fortunately for those of us who like our films to bear some resemblance to their titles, our favourite Vamp does propose to marry the heroine. But brides plural sounds far more exciting than bride singular. Or mattresses. Anyway, I thought we could liven up this poster a bit by making the bats fly. Or perhaps get the orange lady to kick her legs as a token protest at being carried around outside in a Transylvanian night without much in the way of clothing. Or making the good Count Wampyr's eyes glow in an eerie kind of way. Or, if we are really feeling swish, maybe even all three! |
|
Preparation |
|
Open up Photoshop and Transmogrifier. We need to find a suitable object to clone, and our criteria is this:
I have all expansion packs installed up to Superstar, so there are a fair few wall lamps to look at. Now, unless you know how to make an object exp-pack free, it makes sense to choose a base object from as early an expansion pack as possible in order for as many simmers to be able to use it as possible. There are still Sims1 players out there without all packs despite them being so cheap to get a hold of since Sims2.
As flickering wall-lamps were introduced with Livin' Large, by choosing one of them we not only satisfy most simmers, but we also have a few different ones to choose from! Let's take a look at these four options as we will see that some have different attributes than others, making some more suitable for our needs than the rest. |
|
Can you see where TMog says Graphical States: and under that says Torch off, Torch on 1 etc? That means this object has four animations and an "off" state. But it is small, and we would need to do a lot of Z buffer work to make it into a large poster. |
|
Use your arrow keys to scroll through the Graphical States to see the animation working. The more animations the better for making our object but it is still small and would need a lot of Z buffering. |
|
A bit bigger, this, so a likely candidate if nothing better comes up.
|
|
However, this object - and indeed all of the above - comes with a bit of a snag. It only has two rotations - one back and one front. |
|
So we're a little stuck I guess. We can do one of several things here -
Jotapomba has made some very useful base objects (now available at Saving The Sims Group 49) including this very lamp as a four rotation base. So, you need to download and install it - but you will need to make sure Transmogrifier is closed before you install any new objects in your Game Data or Downloads folders. While all her base objects are very useful, the one we are going to be using for this tutorial is called jota_4rot_animwall_lamp.iff |
|
So, reopen Transmogrifier, let's clone Jota's wonderful base and let's get going. You can see that I am calling my object buntutdracula. Giving your object a descriptive name makes life a lot easier when you are looking for it at a later date - and of course makes life a lot easier for your downloading audience as well for house builders in compiling shopping lists or in generally organising objects. :o) |
|
We are only going to concern ourselves with the P sprites for the moment, so export using One Zoom, One Channel. This is a one-tiled object so there is no real need to uncheck the Soft Alpha Channel box. Besides, if we are unhappy with the A channels that TMog makes for us, we can always alter them later once we export using All Channels to work on our Z buffers. Go to Photoshop and open up your Sprites folder.
|
|
Unlike the window tutorial, we cannot ignore any of these folders as they contain the animated states of the lamp. Open up the sprite0500 folder. |
|
Well, actually.... not as much as you might think. We are going to do two things to make things much quicker - make this object backless, and learn a couple of shiny new things about Photoshop. We are going to enter into the wonderful world of Photoshop Actions and Batch Automation. So, cancel your folder opening and let's go! |
|
Photoshop Actions |
|
If that is the case, you need to make it visible by going to the Action bar at the top of Photoshop, choosing Window, and selecting "Show Actions". Once selected, it will then say "Hide Actions". A Photoshop Action is, quite simply, a series of steps in Photoshop that you record and save for later use. These can then be used on single images or on a whole folder of images, with or without subfolders. You will see that you already have some installed; on my screenshot above, you will see I have three folders; Default Actions, Image Effects and Production. These Actions are default to my version of Photoshop. You may well have more (or less) than these. Each folder contains several different actions, all doing different things to the image chosen.
|
|
Like a lot of Photoshop applications, you can create your own customised ones, Google to find free ones to download on the interweb, or purchase professional quality packs of specialist ones. We will be creating our own simple custom ones to add to this list - the first one will simply automatically open all sprites in a folder and convert them from Indexed to RGB. |
|
The options on the Action palette can be accessed one of two ways - the quick shortcut icons along the bottom (shown left), and also by clicking the little arrow next to the Actions tab. This brings up the menu shown right, which is far too elaborate for our needs right now, so for the moment we will just be using the icons. We will bring up this menu a little later on when we come to save our actions.
If your Photoshop default actions folders are not visible, you will need to use this menu to load them up. We will not be using them at all in this tutorial but you might want to use them for other things - or just generally play around and experiment with them. |
|
On the Actions palette, ensuring your cursor is on the Default Actions folder, click the "Create new set" icon as shown left.
|
|
Give your new set a name - mine will be called "sims custom", and you will see your new folder appear on your Action palette.
|
So now we need to create a new action to put in our sims custom folder. On your Actions palette, ensuring that the sims custom folder is highlighted, press the "Create new action" icon as pictured left. |
This will bring up a pop-up menu, where we can give our new action a name. I will be calling mine "Indexed to RGB" because I am boring and that is exactly what this action will do. |
|
|
|
You can see that the Begin Recording icon has turned red, and the Stop Recording icon is no longer greyed out. From now on, until you press the Stop Recording icon, every action you take in Photoshop will be recorded for later playback. If you make a mistake when recording, just hit Stop or Cancel and start again. |
|
The action we are recording is very simple indeed - just go to your Image menu, select Mode, then RGB Color - the same as we always do when preparing to edit a P Sprite. Your image will then convert to RGB, and as that is all we need this action to perform for us, you can now press the Stop recording button on the Action palette, shown below. |
|
There is our new Indexed to RGB action, and the little downward facing arrowhead icon shows us all the individual steps in our recording. In this case, we only took one step, but when you have a moment, go and click the little arrowheads next to some of the Default Actions and see how many steps those have. You might think that we have gone to far too much trouble just to convert one image. And that is true, we have. But by combining our shiny new Action with another Photoshop feature called Batch Automation, we can now open and convert every single image in every folder within our buntutdracula_sprites folder with just one command! |
|
Photoshop Batch Automation |
|
Put your cursor on the new Indexed to RGB command to highlight it (as shown above). Now, from the menu bar, choose File, then scroll down to Automate, which brings up a second menu headed Batch. Choose Batch... |
|
...and a pop-up screen will come up. The first section - Play - is asking us which action we would like to use. You can see that it has already chosen the sims custom set, and the Indexed to RGB action - that is because we highlighted it above. The second section - Source - is asking us what files we want to use our action on. The source option allows us to choose whether the files are in a folder on the computer or to be imported from outside the computer. Ours are, of course, in a folder. As we want to convert every file in the buntutdracula folder (remember, they are all P sprites because we exported using One Zoom, One Channel), I have ticked the option "Include All Subdirectories". The Source / Choose option allows us to pinpoint the files we need automating. Press Choose... |
|
...and a pick list pops up from which we can then navigate the path to the folder we want to automate - called here the Batch Source Folder. You can see that I have chosen the buntutdracula folder, which is located on my desktop inside a folder called 11mogtutwip, itself inside a folder called bun site wip, which lurks inside a folder called Mogrify Main. Your path will no doubt be very different to mine! But that doesn't matter so long as you choose your dracula object sprite folder. The folder icon will appear to be open, and all the folders inside are subdirectories which will be included in our automation. Press OK and you are back to your Batch screen. The final two sections can be left as they are because we are not changing their destination, and if there are any errors, we would like the action to stop there and then.
|
|
Press OK on your
Batch screen and up will unfold a cascade of sprites, all of which will
have been automatically changed according to the Action we have chosen.
We can see this by selecting one and looking at its History palette... ...which shows us the image has been opened and converted to RGB. Now, let's make our object backless.
|
|
The P Sprites - Back |
|
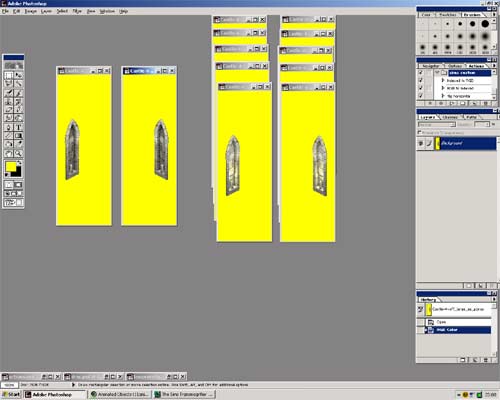
Separate all the back facing sprites from the front facing ones. Then, using the Eyedropper tool, select some of that lovely yellow, then using the Pencil tool on a very large brush, colour over the niche image. Do this for all the back facing sprites. Once you have done that, instead of just indexing each one and saving them as normal, let's create another Photoshop Action for our new sims custom actions folder.
I'm going to leave you to do this all by yourself! This time, we should call the action RGB to Indexed, and instead of making the action perform Image / Mode / RGB, you need to index your image as normal using Image / Indexed / Selective. If you cannot remember what to do, go back here to reference what we did before. Don't forget to press the Stop Recording button once you have finished indexing your sprite! |
|
So, use your new Action to index all the pure yellow sprites individually, and you can now Ctrl-S Save and Ctrl-W Close them. Now, how quick was that to convert, colour, save and close all those sprites? I love a short-cut, me. There is one more thing we need to do while we remember, and that is to save our Actions. |
|
If you have created an Action (or several actions) and close Photoshop, they will still be available when you restart. Each time you restart. However, if Photoshop crashes at any point, or you need to reinstall Photoshop, the actions are lost. Gone. No more. So a word of warning (and believe me, this has saved me from having to recreate my actions several times): save your sims custom action folder each time you make a new action! It's a good habit to get into. You will miss them when they're gone. So, bring up the menu from the little drop down arrow icon at the top right side of the actions palette, and there at the bottom you will see the "Save Action" command. You can only save the entire set of actions, so you need to highlight your Sims Custom folder and then click on this command. It doesn't matter where you save the action set on your hard drive. I usually keep a folder inside my main Adobe Photoshop folder called My Stuff which I can then move over to My Documents if I ever need to uninstall Photoshop. Normally, an action file ends with a .ATN filename extension and Photoshop will prompt this for you. |
|
The P Sprites - Front |
|
First, organise your remaining front facing P sprites so that the NE and SE ones from the same folder are facing each other, and that they are cascaded in numerical order - i.e. Sprite0510 at the top and Sprite0514 at the bottom. They may all look the same, but there are slight differences (honest!) between all the NE facing ones (and all the SE facing ones) so as to animate the candle gently in the game. We will use this feature to make our bats fly / Vlad's eyes twinkle / Orange Girl's legs kick.
|
| You should also open up the zbbsbilandbun.psd template file which you can find in the BunnyWufflesTutorialKit2 folder under "images" as some of the single grids will help in getting the angles right for skewing and resizing the image. |
|
And now we are going to work on our Maitresses.jpg picture to create these animations. Find and open it up from whence you saved it at the beginning of this tutorial. Now, using the Select All command, copy the entire image, and paste it five times, so that you create six layers, all identical. Save your image as a .psd layered document. And now is the time to decide whether you want subtlety in your animations, or an all-out rip-roaring lets-get-as-much-in-as-possible fest. |
|
You will recall from a previous tutorial that double-clicking on the layer name will bring up a pop-up box from which we can give each layer its own name - even the Background layer, which I have decided can be the "off" state of the lamp/picture. Unusually for me, I am going to work on this image without using the zoom option to get up close to it; this will give a better idea of how the animation will look in the game. Highlight layer 0510. This will be the first part of the animation itself. I am going to leave you to do whatever you want, image wise. Just remember to make any differences fairly small ones otherwise the animation will look jerky in the game. Every time you merge / draw / smudge a new piece on, use the eye icon to turn the layer on and off so you can compare the new animated layer with the one below. If the change isn't to your liking you can always change it using the History palette. |
|
Now move on to your 0511 layer, bearing in mind that it has to move on from this layer. Having said that, you could simply leave it as it is and just save your new animation as every alternate layer - but what a waste of having a five part animation that would be. Of course, that is up to you to decide.
There is no need to worry about getting the images absolutely pixel-perfect - don't forget, we will need to scale them down and skew them for our P sprite, and the fuzziness on my images you can see around Orange Girl's legs will not be nearly so obvious then. Once you have completed the changes you want on each layer, save your .psd layered file. |
|
Now, from your zbbsbilandbun.psd template file, shift+move the "single grid block no gaps" layer onto your NE "off" P sprite. You will recall that pressing Shift at the same time as using the move tool to drag an image from one file to another "snaps" the image to exactly the same place in the new file, whereas simply using copy and paste doesn't. We are going to use this template layer to position our portrait of His Fangness.
On your maitresses.psd file, go to the Layers palette and, with the "off" layer highlighted as the active layer, click the little box next to the eye. You will recall from our last tutorial that this activates the Link tool which temporarily locks the layers to each other so that whatever we do to one layer we do to them all. |
|
Now using shift+move, drag the "off" layer of your Maitresses image to your NE "off" P Sprite, to go inbetween the background and template grid layer. You will see from the layers palette that you did indeed bring all the layers across, and they are still all linked together. This is exactly what we need because this now means that however we skew and/or resize our poster, every layer will be the exact same angle and size. Now as it is a matter of your personal taste how large you want your poster to be, I am going to leave it to you to skew and resize. You should know how to do this by now but if you need a reminder, you will find a detailed explanation of the Skew tools in Tutorial 2. And remember, keeping the Shift key pressed during a skew constrains it to keeping the same scale during the skew. I love that Shift key, it does so many things! |
|
Although I cannot see the other layers they are still all there, and have all been skewed and resized. I know this because the Eye icon is open in the Layers palette, and the Link icon is still active for all layers.
Now, you need to do the same to the SE "off" P sprite. Using shift+move, drag the template over, then the linked Maitresses layers, skew and resize to the same shape & size as the NE one only obviously skewed in the opposite direction. You will see mine in progress on the far right here. This is why we needed a four way rotation, so we can read the words of the poster from both front views. This is a little digression, but at this stage, once I know I am going to do a lot of template work, I usually save these P sprites as .PSD layered documents in case I need to go and do something else. This will make it very simple to effect any major changes we may need to do later on to all the P sprites - resizing perhaps. I keep the file names the same so it is easy to reference where they came from originally. If you indeed do this (which I recommend), you will obviously need to open up the .BMP versions of these sprites again to alter for our new object. Put them into the appropriate cascades so you don't forget! |
|
Once you are satisfied, go back to the NE sprite because we are going to make a template. Make a new layer above the Background layer and fill it with Sprite Yellow using the eyedropper and paint bucket tools. Now, go to your grid template layer. Using the paint bucket (set the options as shown here top right), fill the image outside of the grid with Sprite Yellow so that your grid layer looks like mine on the bottom right here:
|
|
Use the Zoom tool to get up close and personal with the grid, and use the paint bucket to fill in the black grid image with Sprite Yellow. Turn the contiguous option off otherwise it will not fill all the black image. You may need to use the History palette if you miss the first time! You should now be left with just the grey of the grid image left. With the magic wand tool, select the grey and delete it. Again, you will need to turn the contiguous option off to select all the grey. You should now be left with a pure yellow template on this layer. We are going to use this template to give us a perfect two-stepped pixelated line on the top and bottom of our picture. We need to do this because when we skewed it, we will have made some semi-transparent pixels which if left alone will give us that muddy yellow edge in the game that we know and love so much. Not. So, using the shift key to keep it in place, move the grid layer downwards until it sits on the top of the image. |
|
To the left is the unstepped image, and on the right is my new stepped image. You may not notice the difference here but you will in the game. |
|
Using the magic wand, click anywhere in the yellow of the template. Now, on your layers palette, go to layer 0510 and press "delete". Do this with all the Maitresses picture layers. This will get rid of any of the unwanted picture image that lies beneath the yellow of the template. I had to do this with every layer individually even though they are still linked; I guess not everything we do to a linked layer affects the rest of the layers. Anyway, deselect the running ants, and using the move tool (without shift), move the yellow template layer sideways and upwards until the bottom of the Maitresses picture layers is stepped nicely.
So here on the left is my uncropped image, and on the right is my cropped image, so I can now use the magic wand tool and delete the unwanted image from all of my Maitresses layers. |
|
Repeat all of the above with the SE "off" P Sprite. This might seem to be a long and laborious process, but it would be even more long and laborious if we had to skew, resize and crop every single layer of our Maitresses image manually, let alone do the next step manually - which is move the layers into the exact same place on all the P sprites for each animation.
The first step is easy - using the shift+move command, drag the full yellow layer from either "off" P sprite to all the other P sprites in the cascade. Now, on both "off" P sprites, click the chain on each of the Maitresses layers to unlink them from each other. Using the "off" NE sprite, again using shift+move, drag the corresponding number of the Maitresses layer to its P sprite. You can see now why I asked you to cascade them in order - you cannot see the original image of the cascaded sprites because of the pure yellow layer. Cascading your sprites in progress in this way is a good habit to get into, especially with animated objects. Once you have completed the NE sprites, do the same with the SE sprites. |
|
So here, you can see that I have dragged Layer 0514 onto my sprite numbers 0514. It was certainly worth the extra time to rename my Maitresses images in line with the sprites, as well as taking the time to arrange and cascade the sprites in Photoshop.
|
|
Because we dragged the Maitresses image, we also retained its Layer name, and it is useful when dealing with lots of sprites like this to take a quick look through the History palettes to ensure we have dragged the right image to the right sprite. When the images all look virtually the same as these do, sometimes that is the only way of checking for errors. Don't forget to do the "off" sprites too as we saved the original ones as .PSD layered documents. And don't forget to save your two .PSD documents with all the layers intact in case you need to go back to them at some stage.
I am not going to close the sprites in case I need to use the History palettes to change anything later. In fact, I never close a Photoshop file unless I am absolutely certain I won't need its History palette again, which in the case of Transmogrifier sprites, is not until I have thoroughly tested the object in my game and am completely satisfied with it. Closing the back view ones was fine because I wanted the object to be backless and there would be no reason to need the history palette to change anything there. But with the front view, there are all sorts of reasons I might need to go back to it; the size, shape, even the picture itself might not be satisfactory until we see it in action in the game. There is one more thing we are going to do before importing our sprites, and that is to give our object a more-or-less permanent label. |
|
The XML File |
|
You know by now that when we export our object from TMog, we have to use Save As, and it always says in the Save as type: box "XML File".... |
|
We are normally only interested in the folder to edit our sprites, but today we are going to edit both files. |
|
According to a search on Answers.com, we read that:
Well, if you understood that you are more computer literate than I. What I do know about the XML file as regard to sims objects is that it is a bit of a two-edged sword. There are things within it that we can manipulate to our good - but if we are not extremely careful indeed, it is also incredibly easy to mess things up good and proper. Dear Ol' Don Hopkins is not kidding when he says "Do not change it unless you know what you're doing". |
|
|
|
So now you have been sufficiently warned, let's romp merrily through our XML file! Go back to Windows, and open up WordPad. |
|
Start / Programs / Accessories / WordPad. |
|
|
|
Your WordPad might default otherwise, but mine starts off by looking for documents of a RTF format, and naturally cannot find any. If yours does the same, from the picklist generated by the arrow, choose "All Documents"...
|
|
The little icon may well be different on your version of Windows, according to the associations linked to that particular type of document. That is nothing to worry about, so long as you can see your XML file and now choose and open it.
|
|
And my, but it's a long 'un! It looks like a load of old gobbledegook, but in fact these lines control what our object does in the game. I cannot stress enough that no matter what you see on your travels through this file, for the moment change NOTHING unless I ask you to in this tutorial. What you see may not necessarily be what you get. Resist temptation. Move away. Some of the longer numbers you see may well be different on your XML file than in my screenshots - that is all part of the object ID / Magic Cookie issue and you can safely ignore them. There are a number of other things which we can safely change in the XML file to our advantage but we will deal with these in another tutorial. What we are going to change in our XML file today is the name of our object and its price. Changing the price in the XML file means that we (or anyone else) won't be able to change the price in the normal Edit Object screen in Transmogrifier. We have "set it in stone" so to speak - until someone else comes along and edits the XML file of course. So why are we changing the name? Two reasons.... |
|
Two: as this base was hacked for us by Jota, I think it is only fair that we immortalise her contribution to the wonderful but small world of cloneable bases. Once our new object bears no resemblance to hers, all her hard work goes uncredited, and that simply is not fair IMHO. At present, the object name says "Lamp - Sconce - Castle 4". I want to change that so it reads: "4 Rotation Lamp Base by Jotapomba"
|
|
..... <objectdefinitions>
And there, just below, is the name of our object - "Lamp - Sconce - Castle 4". That is the part we want to change, so being very careful not to accidentally add any spaces or any other typing outside the quotation marks:
|
|
....which should end up looking like this. |
|
Whew, so far so good! Now, scroll a little way further down until you see....
price="0" This is the price your sim buys the object for. |
|
At present, it is set to 0 because Jota set her base object price to 0. We could change it in the Edit screen of TMog, but as I said above, changing it in the XML file makes it more permanent. |
|
So, think of a price that your Gothic sim would happily pay for such a fitting tribute to the Dark Lord of All Transylvania as our object will be, and replace the 0 inbetween the quotation marks in the XML file with your price. As you can see from the screenshot on the left, mine will be the bargain price of 75. |
|
There is one more price we need to change, and that is the sale price. Ever used the 7DS Snow Rug, Dincer's floor stones or any of my early Fence/Rug pieces? Try selling them after midnight and see what the nice Simolean Fairy brings you! Paying 10 simoleans for a rug and selling it for 512 the next day is a nice and small-but-still-substantial money cheat for those of us who think using Rosebud is a bit too easy on our sims. We can set the sale price of our picture to something more (or less) realistic by scrolling down a little further until we find....
saleprice="75" I am going to change this just a little bit, to 50. If my Gothic sim can bear to part with this picture it must mean he needs the money badly. |
|
For now, go to File and Save our amended XML file in WordPad. We are now ready to import our object sprites and our shiny new XML file into Transmogrifier! |
|
Importing Into Transmogrifier |
| Ensure that you close WordPad before importing into Transmogrifier. With earlier versions of TMog (and also if your computer is short in memory) it was not even advisable to have both open at the same time. But I can honestly say that since I started editing my XML files I haven't had a problem unless I left it open during importing - and then only once. |
|
Import your object and just look at that - the description changed.... |
|
....and so did our price! We will change the other details in the Edit Object options later - for now, let's take a look at our picture. Press "View Object"... |
|
...and then click on the Graphical States menu on Castle 4 off. Using your arrow keys, scroll down the list and back up again. And there's your animation! I'm a little disappointed in the glowing eyes (as in "where ARE they?") but Orange Girl kicks very nicely, and the bats act suitably batty for my liking. Take a look at your other rotations - two are completely empty as we made the object backless, don't forget! |
| Because we kept the P sprites more or less in the same position as the original niche image, we probably won't have a problem (or much of a problem) with our Z buffers. Our A sprites look fine. And, crucially, so do our X and Y co-ordinates. |
|
With the exception of the Castle 4 off sprite, all the other sprites have TWO placements to match up, as evidenced by the box marked Draw Group ID. Transmogrifier has actually placed the off sprite in all the sprites, with the different animation ones on top of them. We need to ensure that the X and Y numbers are identical for both sprites in the Draw Group box for all the sprites in the Graphical States box. If not, the object will appear blurred, and "jump" in the game. |
|
I don't know about you, but I haven't had to change a single X or Y co-ordinate in any of the Graphical States or Draw Groups. Quite amazing for a new object - believe me! So you can see that by choosing a base object more or less the same shape and placement as our desired object, we have saved ourselves a LOT of work. Let's change the name and description of the object in Transmogrifier before looking at our shiny new picture in the game. You may well have noticed by now that typing a description in the Edit box in Transmogrifier is a little strange. You cannot easily create any blank lines as spaces, for instance. What I generally do is create a WordPad or NotePad file for a set of objects so I can simply copy and paste what I want in the Edit Description box. TMog doesn't mind if you do that - but it DOES mind if you copy and paste into the object name box for some reason unknown to me at the time of writing. So my advice is just type the object name as normal, but feel free to copy and paste your description and standard information such as:
Finally, don't forget to press the "Set All" language button when you have finished so that others can read your creative and no doubt witty description. Now close down Transmogrifier and let's take a look at our object in the game! |
|
Checking & Troubleshooting |
|
....and here it is, complete with description. So far, so good.
|
|
Let's give a warm welcome back to Mr Chair Tester (henceforth known as MCT) and his lovely home. We can see from
our screenshot that the object is lined up perfectly with the edges
of the square - you can drag across the grid from the zbbsbilandbun.psd
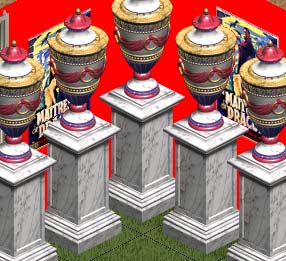
template file to check this if you like. It is a good height on the wall, and it looks like our placements are fine. Let's check the Z buffers using our favourite statue, the Tragiklowna Urn. And it looks like our Zs are absolutely fine. Earlier versions of TMog made very poor Z buffers, but I find that so long as I keep my new object more or less the same shape & placement as the base object, TMog gives an excellent Z buffer these days.
|
|
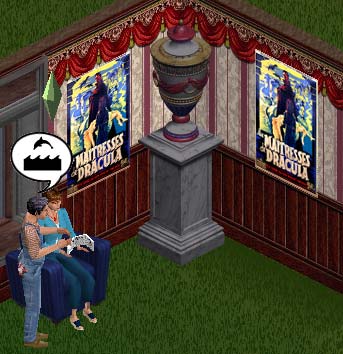
MCT and his dear lady wife Mrs Chair Tester are apparently unconcerned at the goings-on with their new "picture". But we can see that the animations are doing their thing and the lamp glows with sufficient eerieness. I am still not happy that Vlad's eyes don't glow as much as I was hoping, so I will go back and change those on the P sprites. The other thing I am not too happy with after seeing it in the game is that the picture is too long for walls with Dado rails, so I will go back and resize the picture too. Neither of these things will be too fiddly - because I left the files open in Photoshop, I have all the History palettes intact so I can just go back to the stage where I dragged all the Maitresses layers into the Off sprites and skewed them. Even if I hadn't left them open, I still have the layered documents where I resized, skewed and made templates before dragging the image into the cascaded sprites.
|
|
There is one more thing I will do and that is to use the height / Y placement to sort out the small but annoying difference between the NE and SE views that you can see here. If you do this, don't forget to press the "Set All" button afterwards, to change the position in the medium & small zooms. You will also need to re-export the object to set it in place - as we learned in the last tutorial. And don't forget, you will need to ensure that the X and Y numbers are identical for both sprites in the Draw Group box for all the sprites in the Graphical States box. I will have to export this time with One Zoom, All Channels because I may need to change the Z buffers (only slightly) to compensate for the change in the upward placement in the Y channel. Also, the final thing I will change on this object is the A sprites along the top and bottom of the picture. They are too blocky for my liking, so I will just blur them a little to give them a nice smooth edge in the game. Again, if you do this, be mindful that you don't accidentally blur any black into the sprite shape otherwise you will give a slight yellow edge to your picture. I think you are sufficiently versed in all of these bits 'n' pieces to be able to do these yourself by now, so this is where we end our sojourn with Vlad, his dear lady friends and his furniture needs. |
|
|
|
And there we have your first new animated object! Technically, this was also your first hacked object - because we altered something in the XML file, we altered something in the actual programming of the object file, which is what our dear object hacker friends do to make all those shiny new things like extra rotations. Which is exactly what we needed with this base object in the first place..... So now we are a little acquainted with the XML file, let's get a little more down and dirty with it as my next tutorial will deal with just that - our first proper hack : adding rotations to an object. |


|
![]()
 As
with all my tutorials, this consists of several steps all hopefully
easy to follow but because I am assuming that you now have experience
in basic Transmogrifier and Photoshop, you may find that I am either
making certain assumptions and/or using a lot less illustrations at
each step - especially if it is something we have done several times
in the past.
As
with all my tutorials, this consists of several steps all hopefully
easy to follow but because I am assuming that you now have experience
in basic Transmogrifier and Photoshop, you may find that I am either
making certain assumptions and/or using a lot less illustrations at
each step - especially if it is something we have done several times
in the past.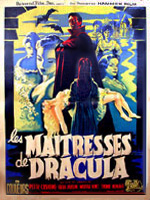 For
this tutorial,
I was thinking we could change a single tiled animated wall lamp into
a spooky picture for your more gothic Sims to enjoy in their garrets,
castles or dungeons.
For
this tutorial,
I was thinking we could change a single tiled animated wall lamp into
a spooky picture for your more gothic Sims to enjoy in their garrets,
castles or dungeons.
 Firstly,
the Castle 1 Torch.
Firstly,
the Castle 1 Torch. Castle
2 is the blue Victorian Coach-style lamp. This has five animations and
an off state.
Castle
2 is the blue Victorian Coach-style lamp. This has five animations and
an off state. Castle
3 is the candle sconce, and again has five animations and an off state.
Castle
3 is the candle sconce, and again has five animations and an off state. Aha!
Castle 4 is the Wall Niche and not only has five animations but is also
the right height for our film poster, thus saving us a lot of Z buffer
work!
Aha!
Castle 4 is the Wall Niche and not only has five animations but is also
the right height for our film poster, thus saving us a lot of Z buffer
work!
 Let
me introduce you to the Actions palette. As you can see, mine is docked
with the Options palette, but yours may be docked elsewhere - or not
visible at all.
Let
me introduce you to the Actions palette. As you can see, mine is docked
with the Options palette, but yours may be docked elsewhere - or not
visible at all.
 To
record our action, we need to have a file open, so in Photoshop, go
to your Sprite0500 folder and open up the first image.
To
record our action, we need to have a file open, so in Photoshop, go
to your Sprite0500 folder and open up the first image.  This
will bring up a pop-up box shown right. This will create a folder in
which we can put all our custom Sims actions.
This
will bring up a pop-up box shown right. This will create a folder in
which we can put all our custom Sims actions.
 Now
press the "Record" button.
Now
press the "Record" button.

 When
you want to play an Action on a single image, all you have to do is
highlight the action you want to use and press the triangle icon on
the Action menu (as shown right). In the case of an action which has
multiple steps, you can even play the action from any step by pressing
its arrow icon or highlighting the step and pressing "Play current
selection".
When
you want to play an Action on a single image, all you have to do is
highlight the action you want to use and press the triangle icon on
the Action menu (as shown right). In the case of an action which has
multiple steps, you can even play the action from any step by pressing
its arrow icon or highlighting the step and pressing "Play current
selection".
 And
now for the main event - changing our wall niche into an animated picture
of a typical Transylvanian night out on the town.
And
now for the main event - changing our wall niche into an animated picture
of a typical Transylvanian night out on the town.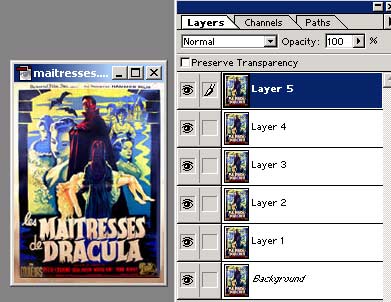
 I
am, of course, going for the lets-get-as-much-in-as-possible option,
so you can see what I am doing at each stage. This will require quite
a lot of cutting and pasting and merging inbetween the six layers, so
first I am going to rename them according to the sprite number I will
eventually paste the image onto.
I
am, of course, going for the lets-get-as-much-in-as-possible option,
so you can see what I am doing at each stage. This will require quite
a lot of cutting and pasting and merging inbetween the six layers, so
first I am going to rename them according to the sprite number I will
eventually paste the image onto. OK,
here on the left is my finished 0510 layer in comparison with my off
layer. Yours, of course, will be different to this - and no doubt a
lot more tasteful.
OK,
here on the left is my finished 0510 layer in comparison with my off
layer. Yours, of course, will be different to this - and no doubt a
lot more tasteful.  I
have done a bit of both and duplicated some images so that the animation
is constantly fluid - you can see this from the animation on the right
of my completed layers:
I
have done a bit of both and duplicated some images so that the animation
is constantly fluid - you can see this from the animation on the right
of my completed layers: 
 Bearing
in mind that I only want this picture to take up one wall tile, I have
sized and skewed it to go exactly between the grey middle line and outer
black line of the template grid.
Bearing
in mind that I only want this picture to take up one wall tile, I have
sized and skewed it to go exactly between the grey middle line and outer
black line of the template grid.

 I
have also cropped some of the side as you can see from
I
have also cropped some of the side as you can see from 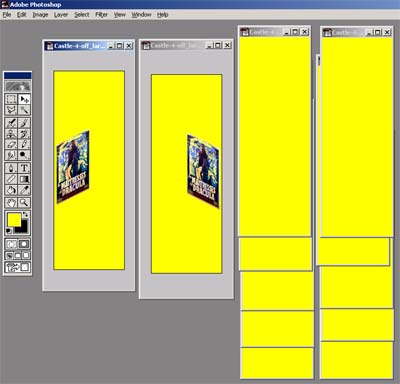
 You
can now use your "RGB to Indexed" action then Ctrl-S save
them to prepare the sprites for importing back into TMog.
You
can now use your "RGB to Indexed" action then Ctrl-S save
them to prepare the sprites for importing back into TMog.
 ....yet
it actually saves in two parts; a folder full of our sprites and an
XML document.
....yet
it actually saves in two parts; a folder full of our sprites and an
XML document.
 You will find it by using the path:
 WordPad
should then open in a new screen, and look a little like mine does on
the left here. Go to File, and navigate to the folder where you exported
your Dracula object.
WordPad
should then open in a new screen, and look a little like mine does on
the left here. Go to File, and navigate to the folder where you exported
your Dracula object.
 ...and
your XML file will appear (along with any other file you happen to have
in that same folder).
...and
your XML file will appear (along with any other file you happen to have
in that same folder).
 One:
we need the practice because we will rename all our objects this way
from now on.
One:
we need the practice because we will rename all our objects this way
from now on. So,
back to our XML file and scroll down just a little way down the page
to where it says.....
So,
back to our XML file and scroll down just a little way down the page
to where it says.....
 And
that, my friend, is that. There are plenty of other things we can change
in our XML files but they will have to wait until another day and another
tutorial.
And
that, my friend, is that. There are plenty of other things we can change
in our XML files but they will have to wait until another day and another
tutorial. 
 Our
base object was a lamp, so we will find our new object under Lighting....
Our
base object was a lamp, so we will find our new object under Lighting....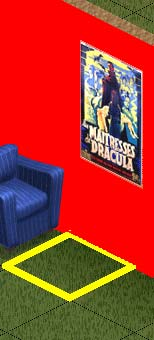
 Only
one thing left to check, and that is how our lamp behaves at night.
Only
one thing left to check, and that is how our lamp behaves at night.